Index:
Disclaimer
What was used
Methodology
Step 1 – Pluging in the card
Step 2 – Loading the PCMCIA Driver
Step 3 – Configuring your network
Step 4 – Activating/deactivating the connection
Remarks
Conclusions
Bibliography
Disclaimer:
Some terms used on this Blog might be trademarks or company names, owned by their respective owners, not by me.
All the information that i post is provided as an attempt to provide help, and knowledge. You may use this information at your own risk.
What was used:
- Computer with Linux Ubuntu. (Linux 2.6.12-10-386 #1 Sat Mar 11 16:13:17 UTC 2006 i686 GNU/Linux)
- pcmcia_cs installed (Ubuntu Brezzy Bager and Dapper Drake as it installed as default)
- pppconfig intalled (Ubuntu Brezzy Bager and Dapper Drake as it installed as default)
- 3G/GPRS PCMCIA card (mine is a HUAWEI E600 from Optimus – Kanguru)
Methodology:
In some cases the HUAWEI E600 firmware upgrade might be needed. To do so, it should used MS Windows, i didn’t found any other way to update the card’s firmware. The firmware can be downloaded from the Kanguru web site, apparently Huawei does not provide the firmware upgrade on their web site.
Step 1 – Pluging in the card:
With the card disconnected wright on the xTerminal write the fowling:
~$tail -f /var/log/messages
This will let know what is happening in the system. Now the card might be plugged in. Check the xTerminal to see the changes.
The feedback information can be one of two things:
- Case 1: The card driver was not loaded when it was inserted. Then it should be something like this on the xTerminal:
[4296903.314000] hub 5-0:1.0: USB hub found
[4296903.314000] hub 5-0:1.0: 1 port detected
[4296903.346000] PCI: Enabling device 0000:07:00.1 (0000 -> 0002)
[4296903.346000] ACPI: PCI Interrupt 0000:07:00.1[B] -> Link [LNKB] -> GSI 10 (level, low) -> IRQ 10[4296903.346000] PCI: Setting latency timer of device 0000:07:00.1 to 64
[4296903.346000] ohci_hcd 0000:07:00.1: NEC Corporation USB (#4)
[4296903.347000] ohci_hcd 0000:07:00.1: new USB bus registered, assigned bus number 6
[4296903.347000] ohci_hcd 0000:07:00.1: irq 10, io mem 0×21001000
[4296903.432000] hub 6-0:1.0: USB hub found
[4296903.432000] hub 6-0:1.0: 1 port detected
[4296903.555000] usb 5-1: new full speed USB device using ohci_hcd and address 2
- Case 2: The card driver was loaded when it was inserted. Then it should be something like this on the xTerminal:
May 2 05:10:19 localhost kernel: [4295017.626000] usbserial_generic 5-1:1.0: Generic converter detected
May 2 05:10:19 localhost kernel: [4295017.632000] usb 5-1: Generic converter now attached to ttyUSB0
May 2 05:10:19 localhost kernel: [4295017.632000] usbserial_generic 5-1:1.1: Generic converter detected
May 2 05:10:19 localhost kernel: [4295017.638000] usb 5-1: Generic converter now attached to ttyUSB1
May 2 05:10:19 localhost kernel: [4295017.638000] usbserial_generic 5-1:1.2: Generic converter detected
May 2 05:10:19 localhost kernel: [4295017.644000] usb 5-1: Generic converter now attached to ttyUSB2
May 2 05:10:19 localhost kernel: [4295017.645000] usbcore: registered new driver usbserial_generic
May 2 05:10:19 localhost kernel: [4295017.645000] drivers/usb/serial/usb-serial.c: USB Serial Driver core v2.0
Note: If this is your case, go to step 3. If you are using “Dapper Drake” (Ubuntu 6.06 RC), your card should be recognized, and the serial_cs loaded when you plug in the card.
Step 2 – Loading the PCMCIA Driver
To check for the vendor and product “ID” in the file /proc/bus/usb/devices, with the purpose of loading the card driver from the Kernel. It was needed to open a new xTerminal [CTRL+SHIFT+N] and type:
Note: that the other one is occupied with the systems report, and i choose to have it running at all times
~$ sudo cat /proc/bus/usb/devices
It should print several entrances, but the only one that matters for this purpose, is the one with the card manufactures. It can be check on the Manufacturer entrance.
T: Bus=05 Lev=01 Prnt=01 Port=00 Cnt=01 Dev#= 2 Spd=12 MxCh= 0
D: Ver= 1.10 Cls=00(>ifc ) Sub=00 Prot=00 MxPS=64 #Cfgs= 1
P: Vendor=12d1 ProdID=1001 Rev= 0.00
S: Manufacturer=HUAWEI Technologies <–my card manufacturer
S: Product=HUAWEI Mobile
S: SerialNumber=HUAWEI DEVICE
C:* #Ifs= 3 Cfg#= 1 Atr=a0 MxPwr=500mA
I: If#= 0 Alt= 0 #EPs= 3 Cls=ff(vend.) Sub=ff Prot=ff Driver=(none)
E: Ad=81(I) Atr=03(Int.) MxPS= 16 Ivl=128ms
E: Ad=82(I) Atr=02(Bulk) MxPS= 64 Ivl=0ms
E: Ad=02(O) Atr=02(Bulk) MxPS= 64 Ivl=0ms
I: If#= 1 Alt= 0 #EPs= 2 Cls=ff(vend.) Sub=ff Prot=ff Driver=(none)
E: Ad=84(I) Atr=02(Bulk) MxPS= 64 Ivl=0ms
E: Ad=04(O) Atr=02(Bulk) MxPS= 64 Ivl=0ms
I: If#= 2 Alt= 0 #EPs= 2 Cls=ff(vend.) Sub=ff Prot=ff Driver=(none)
E: Ad=85(I) Atr=02(Bulk) MxPS= 64 Ivl=0ms
E: Ad=05(O) Atr=02(Bulk) MxPS= 64 Ivl=0ms
Now it’s time to load the PCMCIA serial port driver – serial_cs .
~$sudo modprobe serial_cs
~$sudo modprobe usbserial vendor=0×12d1 product=0×1001
Note: modprobe is a program to add/remove modules from the kernel.
The vendor and the product id in the previous line is for the Huawei E600, you should use the one that you have previously written down, with “0x” in the front because it is a hexadecimal number [1].
The xTerminal where log is being printed, should have something like this:
May 1 14:09:42 localhost usb.agent[8225]: usbcore: already loaded
May 1 14:12:02 localhost kernel: [4294993.412000] usbcore: registered new drive r usbserial
May 1 14:12:02 localhost kernel: [4294993.417000] drivers/usb/serial/usb-serial .c: USB Serial support registered for Generic
May 1 14:12:02 localhost kernel: [4294993.424000] usbserial_generic 5-1:1.0: Ge neric converter detected
May 1 14:12:02 localhost kernel: [4294993.430000] usb 5-1: Generic converter no w attached to ttyUSB0
May 1 14:12:02 localhost kernel: [4294993.430000] usbserial_generic 5-1:1.1: Ge neric converter detected
May 1 14:12:02 localhost kernel: [4294993.436000] usb 5-1: Generic converter no w attached to ttyUSB1
May 1 14:12:02 localhost kernel: [4294993.436000] usbserial_generic 5-1:1.2: Ge neric converter detected
May 1 14:12:02 localhost kernel: [4294993.442000] usb 5-1: Generic converter no w attached to ttyUSB2
May 1 14:12:02 localhost kernel: [4294993.442000] usbcore: registered new drive r usbserial_generic
May 1 14:12:02 localhost kernel: [4294993.442000] drivers/usb/serial/usb-serial .c: USB Serial Driver core v2.0
Note: There are three USB ports. Mine are called ttyUSB*, but it can also be called of ttyS* (where * may be 0,1,2). The USB0 is used for ppp connection, USB2 is used for network related tasks, and USB1 doesn’t have any particular function[2].
Just to make sure, if the devices are mounted:
~$ls -l /dev/ttyUSB*
Step 3 – Configuring the network access
To configure the network access, i used pppconfig. Several other programs, such as wvdial, gnome-ppp, or others might be used, suit what is best for you. On my xTerminal i wrote down:
~$sudo pppconfig
And then i created a new connection, that i give the name “Kanguru”.
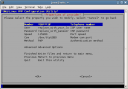
notes (check the picture):
- I used Dynamic DNS and PAP Protocol.
- The connection speed should be set as high as possible, i tried the recommend by Harwick – 460800 [2].
- On the dialing mode i selected “tone”.
- My user name was the card number, and the password was the PIN.
- the phone number is *99***1#, and appears to be international.
- In my case the program didn’t found the connection port, so i used the /dev/ttyUSB0 (note: the capital letters are very important)
Step 4 – Activating/deactivating the connection
To activate the connection:
~$pon the_name_on_step_4
To deactivate the connection:
~$poff
To eject the card:
~$ sudo cardctl eject
Instead of always open your xTerminal to to eject and kill the network connection, you can simplify this action by making a script:
Open Gedit (or the favorite ascii text editor):
#!/bin/bash
#created by jose reis
gksudo -u root -k -m “Enter SUDO password to eject the PCMCIA CARD”
poff -a
sudo cardctl eject
Save as “PCMCIA-eject“, or the file name you wish, in [my_home] “~/.gnome2/nautilus-scripts“. And then change the permissions (right click on the file, and then “Properties” on the tab “Permissions”) to execute.
The script should be avaible if you right click on the Desktop, choose the scripts option, with the name you have gicen to the file, in this case PCMCIA-eject.
Note: It is important to eject the card before you remove it, if you fail to do so you may risk to damage your card.
Remarks
I saw lot’s of techniques how to configure the network, since using gnome-ppp, constructing my own wvdial.conf file by hand from scratch, etc.. But none of them worked for me, so i decide to start searching for other solutions. And this is only one solution.
I did not upgrade my firmware, because, at this time, i do not have access to any machine with MS Windows and PCMCIA card connection, but it is highly recommended by Optimus to do so.
One major problem that i am yet to solve, is every time that i reboot my laptop i have to load the PCMCIA card driver, witch is very annoying. This problem is already solved in the “Dapper Drake” (Ubuntu 6.06 RC).
Conclusions
It does not a require hard work to load a PCMCIA card 3G/GPRS connection to work. But i do not think that it is not very user friendly, the amount of information that the user must deal with is big and a bit intimidating for the majority of the computer users, allied to the fact that the providers do not support any other OS than the Microsoft OS.
The most difficult part was to activate the connection to my provider, it toke me almost a day do accomplish that. The configuration strings that i found on the Internet did not worked for me.
Of the techniques that i read, this one, i believe, is the most easy to use technique, because you do not have to change/edit/create files by hand on your system, and pppconfig is a very simple to use program. I don’t know if it works for others providers, i only know that it works for me.
Bibliography:
-
Murdoc.l, “Vodafone Mobile Connect 3G/GPRS in Ubuntu Linux” 13:47, 9 March 2006 (UTC)
-
Hardwick, Paul, “Vodafone 3G (UMTS) Howto, Version 1.5”, 23/02/2006
-
Engert, Kai “Linux and the Vodafone Mobile Connect (UMTS) 3G/GPRS Datacard”, 2005-10-07
-
Cecco, “Config. Vodafone connect card UMTS/GPRS” 17:23, 30 Jun 2005 (CEST)

